


PosiTector® RTR 3D
Replica Tape Reader to Measure and Record 2D/3D Surface Profile Parameters
Digital spring micrometers measure and record surface profile parameters using Testex Press-O-Film™ replica tape.
- Create a replica by burnishing tape on a surface and insert into instrument. 3D imagery and 2D/3D parameters are displayed in seconds!
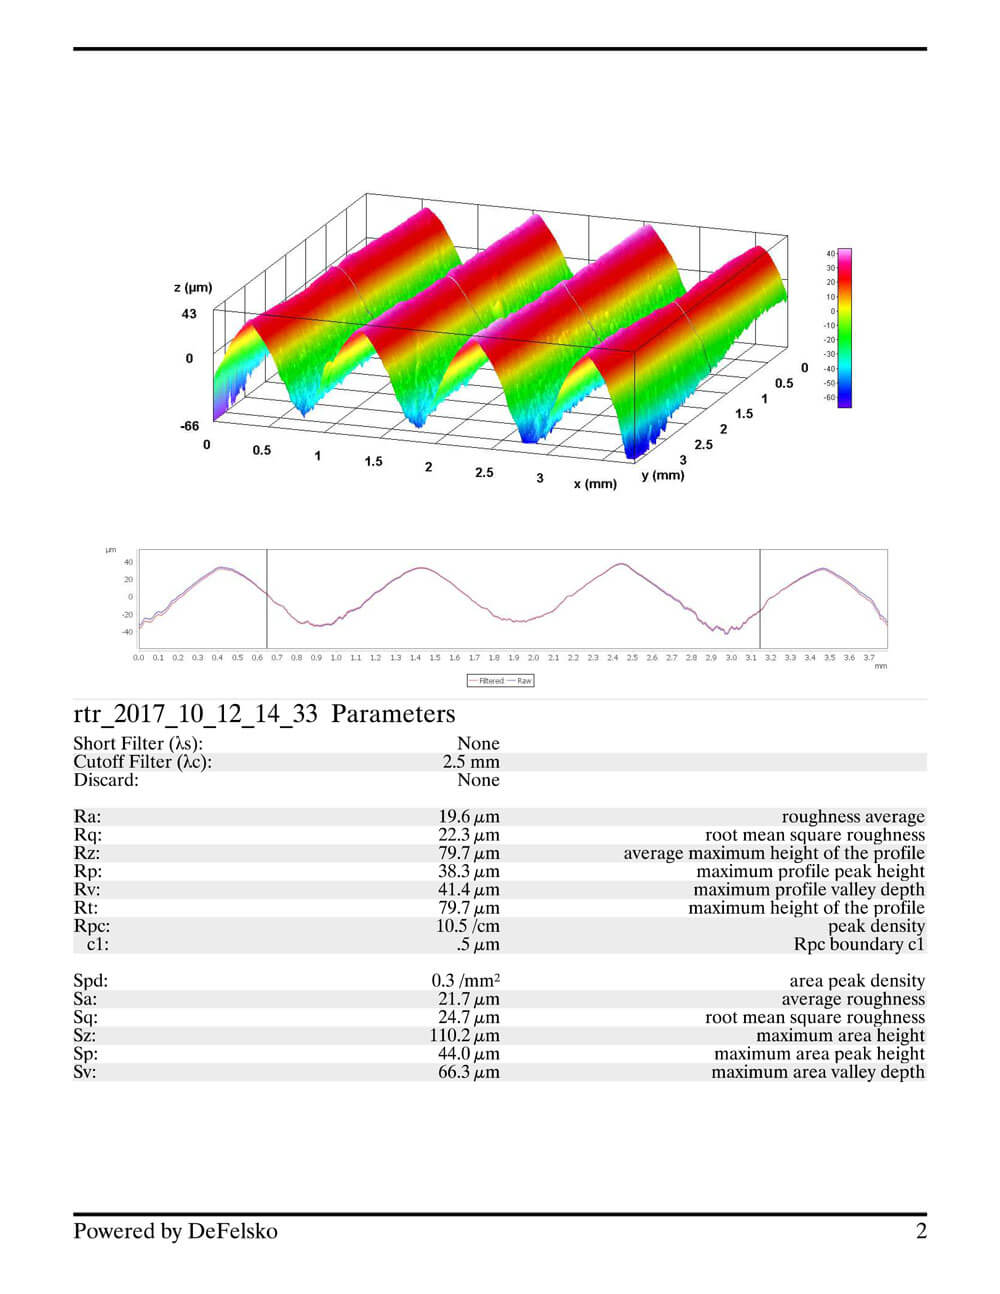
- Reports common parameters: Ra, Rq, Rz, Rp, Rv, Rt, Rpc (2D), and Sa, Sq, Sz, Sp, Sv, and Spd (3D)
- Ideal for field or laboratory use; flat, curved or irregular surfaces
- Certified and traceable to an accredited national laboratory
- Download 3D .SDF image files for analysis in included PosiSoft or third party software

How It Works
1.Prepare
Preparation of both the surface to be tested and the PosiTector RTR 3D are necessary before performing the test.
To prepare surface:
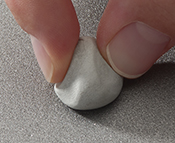
- Use cleaning putty to remove dust, debris, or residual blast media from the measurement site by firmly pressing the putty onto surface to be tested using your fingers and remove
To prepare the PosiTector RTR 3D:
- Clean anvils and camera lens using included cleaning card. Swipe card through opening a few times while firmly pressing both probe buttons to remove dust
- Zero probe and verify accuracy with included shim
- Ensure correct grade of replica tape is displayed in upper left hand corner of LCD
2.Burnish
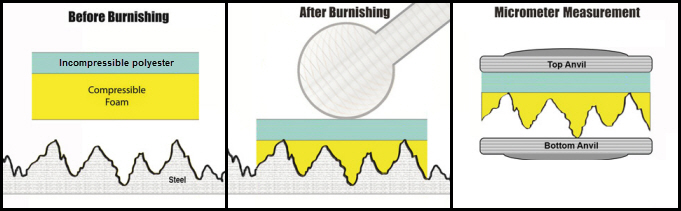
Testex Press-O-Film™ replica tape consists of a layer of compressible foam affixed to an incompressible polyester film of highly uniform thickness. When pressed against a surface, the foam forms an impression, or reverse replica, of the surface. For best results when acquiring 2D/3D parameters and images from the PosiTector RTR 3D, it is recommended to use the supplied burnishing ball instead of the stainless-steel burnishing tool.
- Adhere the replica tape to the surface to be burnished.
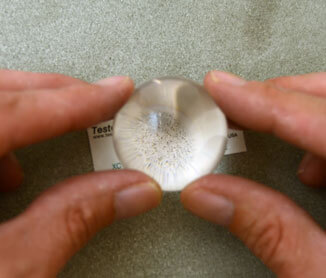
- Holding the ball in two hands using your index fingers and thumbs, place the ball on the replica tape.
- Gently roll the ball over the tape while viewing the burnished tape through the clear ball. Adjust the force applied to the ball until a replica of the surface begins to appear on the tape.
- Continue to roll the ball until the tape is completely burnished (at least 30 seconds).

3.Measure
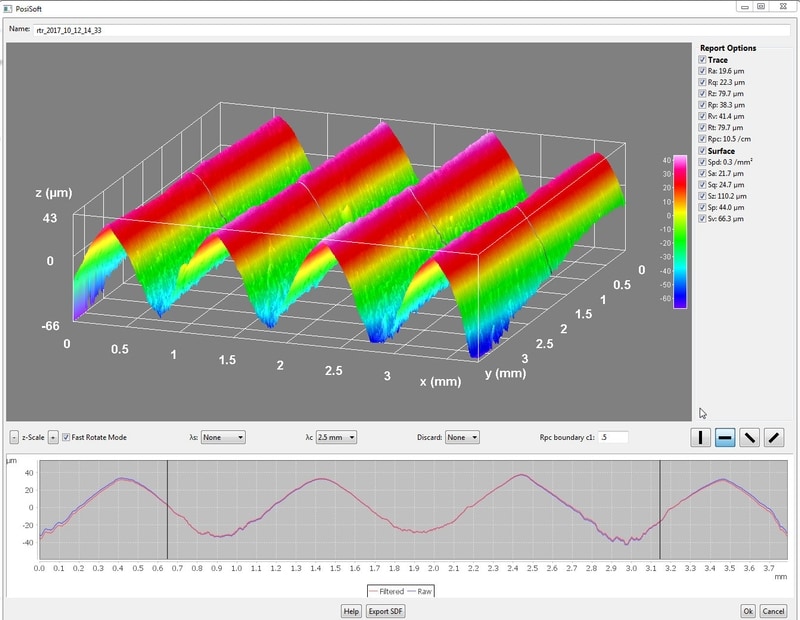
After placing the compressed tape (replica) into the PosiTector RTR 3D a light-intensity versus thickness algorithm is used to produce a three dimensional (3D) image of the replicated surface.
- Insert the burnished replica tape into the measurement opening. Ensure the tape is properly positioned so that the burnished region is centered within the opening in the probe with the adhesive (sticky) side down.
- To position the tape, move the Testex™ Press-O-Film™ replica tape to the back of the probe and align the two dots (printed on replica tape) with arrows on both sides of the measurement opening.
- Once positioned, firmly press both probe buttons simultaneously and hold until the PosiTector RTR 3D beeps and the measurement is displayed.
 Brochure